|
|
|
Guide to ripping audio from the DVD of Everything
to Everyone on Mac OS X
(Click here for the Windows version of this document)
In this guide, I will teach you how to rip audio from the E2E DVD, not only to make CDs/mp3s of the bonus tracks, but also to make your own CD/mp3s of the main tracks with higher quality than the official E2E CD.
Note that this guide is not designed for novices. This is a fairly involved process. It's not "rocket surgery," but it might scare off the squeamish. If you have a choice between doing this on a Mac and doing this on Windows, I highly recommend you use the Windows version of this guide. You will get better results with less hassle and with more flexibility. The Mac way is okay, but the Windows way is better.
For those of you who want an easier solution and don't care so much about audio quality, you can use a program like WireTap. This program allows you to basically just play the DVD and hit the record button. Because this process involves going from digital to analog and back to digital, the quality won't be as good, but a lot of people probably won't even be able to tell the difference. If this sounds good to you, go for it.
If you're like me, you want to get the best quality possible, even if it takes a little less work. If that's you, this guide is for you.
Why is the quality better than the retail CD? It's still just a CD.
You may be wondering if it's worth going through all this hassle for tracks you already have on the CD. If you care about audio quality at all, it's definitely worth it. "How can this be?" you ask. You're right to be skeptical. After all, a CD can't take advantage of all the DVD-Audio goodness. While it's true that your new CD won't be as good as DVD-Audio, and it won't even be as good as the AC3 DVD-Video tracks we're ripping in this guide, it will produce results noticably better than what the record label put out on the retail CD. This is due to a few factors:
What You Need:
1. Decrypting the DVD
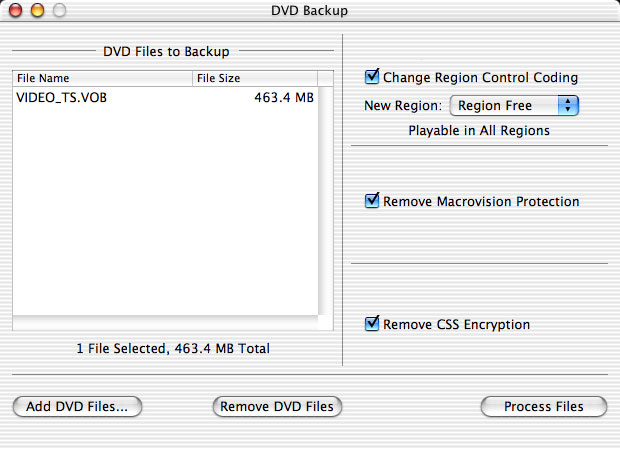
Due to the encryption on a DVD, you can't just copy the files onto your hard drive. For this, we need to use DVDbackup. Put the DVD in your DVD drive and load up the program.
Click "Add DVD files" and select VIDEO_TS.VOB from the VIDEO_TS folder on the DVD.

Make sure everything is checked, click the "Process Files" button, and choose a destination for the file.
2. Stripping (Demuxing) the VOB
The VOB file you ripped from the DVD contains all sorts of videos, menus, and other sounds we don't need. We will use bbDEMUX to strip the needed AC3 files from the VOB.
Unfortunately, there doesn't appear to be any software for Mac like VOBRator on Windows, which will process and separate streams. This means that we're going to end up with one huge AC3 file with a lot of extra stuff we'll have to cut out manually later.
To use the program, just drag the VOB file into the window and let it do its thing.

After it's done, you'll have a few new files. All we care about is the AC3 file, so you can delete the others.
3. Converting the AC3
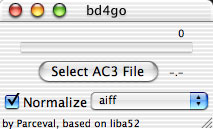
With the right software, you could play this AC3 file now, but to get it in a more useful format, we'll use bd4go to convert it to AIFF.
Make sure "Normalize" is checked. For best quality on your mp3 files, leave it set for AIFF. (For compatability purposes with some mp3 players and some CD burning programs, you may need to resample to a 44.1 kHz WAV file.) Click "Select AC3 File" and....well, select the AC3 file.
This will take a while, so go have a snack. This step is optional.
4. Splitting the big AIFF into tracks
Now, you've got this huge AIFF file with the acoustic tracks, two versions of the album, plus a bunch of background music that plays on the DVD menus. So, we've got to split up this file and throw away the parts we don't want. This is the most annoying part of the process. I couldn't find any really good Mac software to do this. If you have Toast, you can use CD Spin Doctor, which is decent. I ended up using Sound Studio. They both kind of suck, and both hung at least once. I guess they get a little overwhelmed by the size of the file.
Just to give you an idea of where you're going to want to split the file, there's some background music at the beginning, then the acoustic tracks, then some more bacground music, then the album downmixed from the 5.1 version, then the album again in stereo, then yet some more background music. The 5.1 mix seems to be higher quality. You can use either version of the album, which ever sounds better to you. In either case, I recommend the stereo mix of "Yes! Yes!! Yes!!!" The 5.1 mix has a glitch.
I won't talk much about CD Spin Doctor, but there's an automatic thing in there that will give you a good start on splitting the tracks, but you'll have to go in there and fix the mistakes it made.
For Sound Studio, the top shows the waveform for the whole file. Below that is a zoomed in view of the current location in the file.
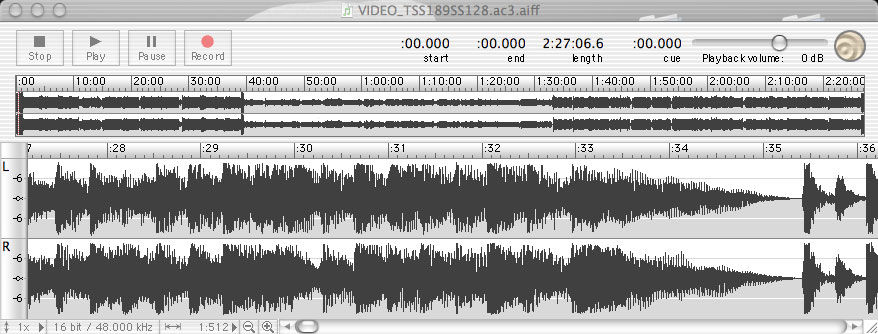
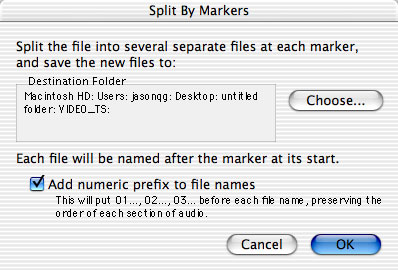
To split it up, go to Insert > Marker at every point where you want to split a track. When you're done with that, go to Edit > Split by Markers to split to a bunch of smaller AIFF Files.
5. Burning an Audio CD
I assume you can handle this part on your own. Use iTunes or Toast or whatever strikes your fancy to burn your CD(s).
6. Encoding MP3s
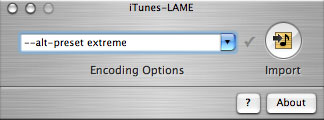
Copy the desired tracks into iTunes and edit the track info (artist, album, title, etc). Put checkmarks next to the tracks you want to convert, then start up iTunes-LAME Encoder from the scripts menu.

Enter one of the following commands:
Click "Import" to convert to mp3.
If you want, you could make Ogg Vorbis files, AAC, or whatever your preference instead of mp3s. For me, mp3s get the job done beautifully, while being playable in all my machines and portable players.